recent posts

social media menu

Showing posts with label cheap tricks. Show all posts

Hinge sprucing #cheaphometricks

We've just redecorated the bathroom, and you can see from the cracked paint below how badly it was in need – but that's a story for another day. 

Because today I just want to focus on one tiny change we made to the room that cost just a few quid, a bit of effort and – in my opinion – has given our bathroom door a bit of a new, design-y lease of life (plus it's a more positive DIY story than last week's grout reviving disaster...).


In pretty much every place I've lived, the door hinges have looked like this. When it comes to redecorating, the choice is: spend an hour or so hacking away at years and layers of paint to clean the things up... to reveal a not very exciting grey, scratched hinge.


Or – and I'm guilty of this one – add another layer to that paint and hope it helps the hinge to blend into the background. (Never, of course, daring to think of the day you might need to get to the screws through a centimetre of dried satinwood...)

So credit to my boyfriend for coming up with a better solution: to replace all the door hinges in the house with brand new brass ones. It's a tiny detail but one with a potentially big impact. So, since we were painting it anyway, we started with the bathroom door. What do you think?

I think they look dramatically good, for hinges.

A bag of three butt hinge brass door hinges cost us £10.98 from B&Q, so it doesn't cost much for this pretty noticeable revamp, depending on how many doors you have of course (and it's the kind of job you might want to space out anyway – changing doors can be heavy and fiddly, and if you don't know how, you should definitely check out this excellent series of YouTube videos by Tommy the builder. They're my new favourite way to relax...).

But back to our hinges. Here's how the new ones look in comparison to those on the adjacent bedroom door...

Simple and inexpensive but brilliantly effective, I think. Love to know what you think – and also if you have any clever or simple #cheaphometricks, do share!

Post by Kate

Real homes: when DIY
goes wrong

It was meant to be a cheap, quick way to give the shower room a spring spruce-up. 

We had a leak in there, and while I was shopping for grout and silicone to fix it, I was dazzled by the grout reviver on sale nearby (everyone else gets excited and over-shops at DIY stores too – right?). A sparkly new bathroom for just a few quid? Yes please. Only things haven't gone quite to plan...

This enticing tube was the thing to transform the tiled floor from grubby-even-when-scrubbed to good as new. It'd also help to make the bit I had just fixed (that gleaming white line on the right) less prominent. Here's a better look at what I was hoping to transform.

Grimy innit? Though I should add, for my dignity, that the floor hadn't been cleaned for some time as we have been using the main bathroom since the leak, and tramping in here in big shoes. Still, cleaning only ever went so far anyway.

But back to the DIY. The tube of reviver has a sponge-y top which you can see here...

It isn't designed so you can be precise – stage one of the job is just to smear it across those cracks messily.

I was excited to start to see how bright the grout was looking already, though wondering how exactly I'd be getting it off of the tiles. The idea is that, after about half an hour, you wash off all the excess reviver from the tiles themselves, leaving just the grout gleaming whitely back at you. Except...

...what is really far down the instructions, and which I hadn't seen, is a line that reads: not suitable for matt tiles. Do you notice how un-shiny the green tiles are? Oh yes. And I read this once I'd got about this far...

Uh-oh. Though I haven't used a product like this before, I'm far from a DIY novice – how could I have made such a monumental cock-up? I cursed the packaging designer and instructions copywriter because it was easier than cursing my own stupidity (though, fairly or not, I do still curse whoever decided not to put that bit at the top).

Before the damn stuff dried any harder, I had to start washing it off. 

And when that didn't work, I tried to scrape it off with a razor blade. Yes, each individual little tile. It took over an hour, gave me massive back ache and, even then, it only looked like I'd been painting the walls without a dust-sheet on the floor. I see that you can also buy a grout reviving pen, which I think is what dazzled me in the first place, as I'd seen it in this satisfying Apartment Therapy story.

I am guessing the pen is more precise and may do the job (though obviously, ahem, I'll read the label in full before I buy). I'll give that a go, and will probably be having nightly razor blade sessions for the next few weeks to get the rest of the white marks off.

Anyone else care to share a DIY disaster?

Post by Kate


Real homes: a designer's £800 total renovation

Bobby Petersen's amazingly thrifty warehouse flat in north London filled me with inspiration when I went to nose around it a few months back.

I was there to write about his place for a piece published in last weekend's Guardian Weekend mag. You can read that here, but here are some bonus pictures of his insanely creative ideas.

The flat was a derelict, one-room warehouse space when Bobby, then a Royal College MA student, moved in a couple of years ago. It had long abandoned by its original manufacturing tenants, and used since only by some shady characters requiring nothing but the concrete floor and some privacy.

Now, just £800 later, it looks like this.

Bobby has created two raised bedrooms, a kitchen, a wholesome glossy floor, a whole workshop area and a lovely, airy feel. Oh, and there's a boat hanging from the ceiling (one of Bobby's pieces, designed for the American Hardwood Council: he made pretty much everything in the flat that he didn't find on the street or get given by college friends – it's handy studying alongside a bunch of product designers). AND the brilliant cardboard lampshades you can see over the big table, made with plain old cardboard boxes stuck together with a glue gun, some rice paper to reduce glare and – importantly – very low-heat bulbs so as not to cause a massive fire.

Isn't the bedroom door – that giant turquoise flap in the image above – clever?

The stairs (also made by Bobby) were rather hairy. Beautiful, though.

And the ceiling height is perfect for growing indoor climbers. This idea – of hand-built shallow boxes either up against a wall, with wires extending upwards – is something I aim to steal shamelessly for my mad, fat empty wall.

I love how simple things can be: the wires don't even have to be attached through drilled in holes (great if you're an impatient DIYer like me). Just get busy with the bulldog clips.

And who needs plant-pots? Good to see another fan of plastic animals around the house too.

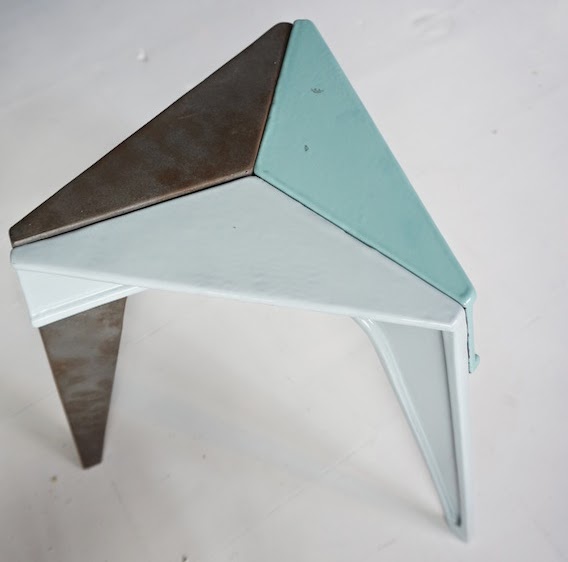
This beautiful cast iron stool weighed a tonne. It was made Bobby's friend and sometime design collaborator, Tom Gottelier.

The baking trays are part of a design experiment Bobby is collaborating on, coating metals with inexpensive industrial treatments. Nice effect.

Love the leafy, light work nook. A bit of clever zoning and you hardly notice there are no walls.


The designer by his scarily vertical stairs.

And the excellent entrance gates.

Some of Bobby's designs, in collaboration with Made by Works appeared at Heal's Modern Craft Market earlier this year. You can also read about Bobby's inexpensive-themed collaborations with his friends Tom Gottelier and Elliot Hartwell, who also took part in the Heal's event, at Going Into Business.

Bobbypetersen.com (Do seek out his marvellous Polar Bear Puzzle.) 

Words and photography: Kate